
The Vial Sealing Process Explained, Step by Step
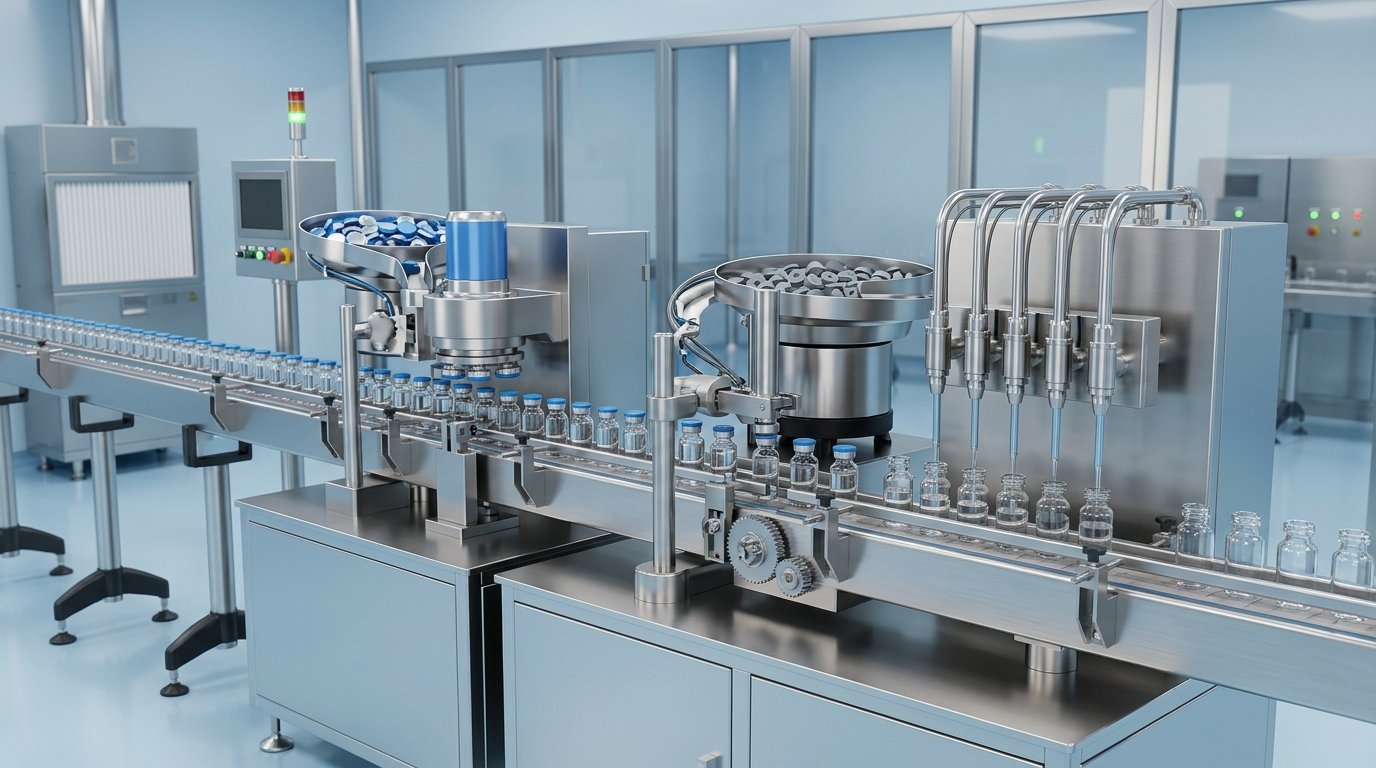
The vial sealing process is the sequence by which a pharmaceutical vial is filled, stoppered, and capped: the drug is filled into the glass vial, a rubber stopper is inserted into the mouth, and an aluminium or aluminium-plastic seal is crimped over the stopper to hold it compressed and seal the package. Each step is controlled, because the finished seal has to keep the contents sterile across the product’s shelf life. For sterile injectables, the whole process runs under aseptic conditions so the product is not contaminated before it is sealed.
This guide walks through the steps of sealing a vial, explains what happens at the capping station, and describes why the process is controlled.
Key takeaways
- The vial sealing process is fill, stopper, cap (crimp): fill the drug, insert the rubber stopper, crimp the seal over it.
- The crimp at the capping station is what actually seals the package, by holding the stopper compressed against the glass.
- For sterile injectables, the process runs under aseptic conditions so the product stays sterile until it is sealed.
- Freeze-dried products add a step: the slotted stopper is partly seated for drying, then pushed home, per ISO 8362-5.
- Sealed vials are inspected, and capping is treated as a critical, controlled step under EU GMP Annex 1.
- A correctly sealed vial is verified by container closure integrity testing.
The steps of sealing a vial
A vial is sealed in three core steps: filling, stoppering, and capping. On a fill-finish line these run in sequence at high speed.
- Filling. The cleaned, sterilised glass vial is filled with the drug product (a liquid, or a solution to be freeze-dried) to the specified volume. Everything upstream of this point is covered in the end-to-end fill-finish process.
- Stoppering. A rubber stopper is inserted into the vial mouth. The stopper is the elastomeric closure that forms the resealable barrier. For freeze-dried products, the slotted stopper is set in a raised position first so vapour can escape, then pushed fully home after drying.
- Capping (crimping). An aluminium or aluminium-plastic seal is placed over the stopper and crimped around the vial neck. The crimp compresses the stopper against the glass and locks the assembly, sealing the package.
After capping, the sealed vials are inspected and move on to labelling and secondary packaging. The pairing of stopper and seal that makes this work is covered in pairing the rubber stopper and aluminium seal.
What happens at the capping station
At the capping station, the seal is placed over the stopper and a capping head crimps the aluminium skirt under the vial neck flange, compressing the stopper to form the seal. This is the step that actually closes the package: until the seal is crimped, the stopper merely rests in the vial.
Mechanically, the capping head applies a controlled downward force while rollers fold the lower edge of the aluminium skirt inward and under the neck flange. The result is a permanent mechanical clamp holding the stopper under compression. The quality of this crimp determines whether the package seals: too loose and it can leak, too tight or uneven and it can damage the stopper or glass. The detail of the crimp is covered in vial crimping explained, the seal mechanism in how flip-off caps work, and the equipment classes in vial sealing machine types.
Why the process is controlled
The vial sealing process is tightly controlled because the seal protects a sterile product, and a fault introduced during sealing can compromise sterility or integrity. Several controls apply:
- Aseptic conditions. For sterile injectables, filling and stoppering happen in a controlled, classified environment so the product is not contaminated before the vial is sealed. EU GMP Annex 1 sets the expectations for sterile manufacturing.
- Controlled capping. Capping is treated as a critical step; Annex 1 expects it to be controlled and sealed vials to be inspected, for example to detect missing or defective seals.
- Component quality. The stopper and seal must meet their specifications and be dimensionally consistent so they crimp reliably at speed.
- Integrity verification. The sealed package is shown to maintain its barrier through container closure integrity testing, within the framework of USP <1207>.
Because all of these depend on a clean, consistent crimp, the components and the capping parameters are qualified together for each product.
How this works in practice at Autofits
Autofits supplies the seals used in the final, sealing step of this process: FlipTop Optima flip-off seals, tear-off and tear-down aluminium seals, and aluminium pilfer-proof (ROPP) caps, in 13, 20, and 32 mm sizes (the full products page lists the range). Because the seals are produced to tight dimensions with high-speed visual inspection, they feed and crimp cleanly on customers’ capping lines, which is what supports a consistent seal at production speed. How seal design affects line throughput is discussed in vial seal design and filling line speed. Production runs under an ISO 15378:2017 quality system, alongside ISO 9001:2015 and ISO 14001:2015 certification and a Drug Master File, in a 75,000 sq ft Nashik facility with an ISO Class 8 cleanroom. The full certification set is on the quality page.
Frequently asked questions
What are the steps of the vial sealing process?
The vial sealing process has three core steps: filling the drug into the glass vial, inserting the rubber stopper into the vial mouth, and capping (crimping) an aluminium or aluminium-plastic seal over the stopper. The crimp compresses the stopper against the glass and seals the package. For sterile injectables, these steps run under aseptic conditions.
What actually seals the vial?
The crimp seals the vial. At the capping station, the lower edge of the aluminium seal is rolled under the vial neck flange, compressing the rubber stopper against the glass and locking the assembly. Until the seal is crimped, the stopper just rests in the vial mouth; the crimp is what creates the sealed, sterile package.
Why is vial sealing done under aseptic conditions?
For sterile injectables, the product cannot be sterilised again after the vial is sealed, so filling and stoppering are done in a controlled, classified environment to keep the product sterile until it is sealed. EU GMP Annex 1 sets out the expectations for these aseptic conditions and for controlling and inspecting the capping step.
How is a freeze-dried product sealed differently?
For a freeze-dried (lyophilised) product, a slotted stopper is set in a raised position so water vapour can escape during drying. At the end of the drying cycle, inside the freeze-dryer, the shelves press the stoppers fully home to seal the vials. An aluminium or aluminium-plastic seal is then crimped over each stopper, the same as any vial. The slotted freeze-drying closure is covered by ISO 8362-5.
How is a sealed vial checked?
Sealed vials are inspected for defects such as missing, raised, or damaged seals, and the package’s ability to stay sealed is verified through container closure integrity testing within the framework of USP <1207>. Under EU GMP Annex 1, capping is a controlled step and sealed vials are inspected as part of sterility assurance.
Related reading
- Vial crimping explained
- How flip-off caps work
- Pairing the rubber stopper and aluminium seal
- Sterile vial sealing
- Container closure integrity testing
Sources
- European Commission: EudraLex Volume 4, EU GMP Annex 1, Manufacture of Sterile Medicinal Products (https://health.ec.europa.eu/medicinal-products/eudralex/eudralex-volume-4_en)
- USP-NF: General Chapter <1207>, Package Integrity Evaluation, Sterile Products (https://www.usp.org/)
- ISO: ISO 8362-5:2016, Injection containers and accessories, Part 5: Freeze drying closures for injection vials (https://www.iso.org/standard/65448.html)
*Last updated: 2026-06-18. This article is general technical information, not regulatory or compliance advice; confirm current standard editions and requirements with the issuing bodies.*
